Dolby Atmos is the most immersive version of surround sound you can get at home. Though it took some time to catch on, the format is now everywhere, from movie theaters to Ultra HD Blu-ray discs, as well as the world’s streaming services like Netflix, Amazon Prime Video, Apple TV+, and Disney+.
But what, exactly, is Dolby Atmos? How is it different from other kinds of surround sound? And perhaps most importantly: If you decide you want to experience Atmos at home, how can you make sure that’s exactly what you’re getting? Dolby Atmos can be awesome, but getting it is (unfortunately) a bit more complicated than simply buying a TV or a soundbar with the Dolby Atmos logo on the box.
Just want to know what all the Dolby Atmos fuss is about? We got you covered. Want to become a Dolby Atmos expert? This guide will get you there, with as little jargon as possible.
How to use this guide
We’ve organized this ultimate guide to Dolby Atmos into three parts.
Part 1 covers the basics. If you just want to know what Dolby Atmos is and why you should care, this will cover a few key concepts. The next time Dolby Atmos comes up in conversation, you’ll know exactly what folks are talking about.
Part 2 gets a little deeper. It’s for people who are seriously thinking of how they can get a Dolby Atmos experience at home, with explanations about the gear you’ll need and how to decipher some of the jargon that gets thrown around, like discrete versus virtual channels, and what numbers like 7.2.4 mean.
Part 3 is dedicated to navigating the Dolby Atmos ecosystem to make sure you’re actually getting the Dolby Atmos sound you’ve invested in. As with so many things in our technological world, it’s not quite as simple as it should be. That’s why we’ll get into the sneaky gotchas that can come between you and a true Dolby Atmos experience.
Part 1: what is Dolby Atmos?

Traditional surround sound literally surrounds you. The sound comes from in front, beside, and sometimes behind you, too. Dolby Atmos takes this to the next logical step, with sound that comes from above. Instead of sitting in a ring of sound, with things coming at you in a fairly flat, directional manner, you’re sitting under a dome of sound.
Another characteristic of Dolby Atmos that makes it so immersive — so “3D” as many people refer to it — is its ability to move individual sounds around within that dome. Or exactly the way sounds work in the real world. You get the sense of motion, not just directionality.
Don’t worry, you don’t necessarily need to mount speakers to your ceiling to get this effect. (Though doing so will sound incredible.) Thanks to the technology that makes Dolby Atmos possible, there are plenty of ways to experience Dolby Atmos that don’t involve putting holes in drywall or spending thousands of dollars, and we’ll cover many of these options in a moment.
Before we do, let’s cover a key concept that will help you understand how Dolby Atmos actually works. Trust me, when we get a little deeper, you’ll be glad we started here.
Metadata — Dolby Atmos’ secret sauce
At a deeply technical level, Dolby Atmos isn’t actually a soundtrack at all. It’s metadata (extra information about the soundtrack) that is used by compatible audio gear to control which speakers are reproducing certain sounds.
In the studio, audio engineers using Dolby Atmos mixing technology are able to treat individual sounds as “objects,” which can then be moved independently inside that dome of sound. The classic example is the helicopter that flies in from a location behind your right shoulder, then hovers in place overhead for a few seconds before screeching off to somewhere just to the left of your TV screen.
What’s so clever about Atmos is that the movement of the helicopter is represented as a set of instructions (the metadata), not embedded directly into the soundtrack.
A Dolby Atmos sound system can read that metadata and decide how best to send the helicopter’s movements to your available speakers, ultimately creating a sound experience that is far more immersive than previous surround sound technologies.
And what about Dolby Atmos Music?
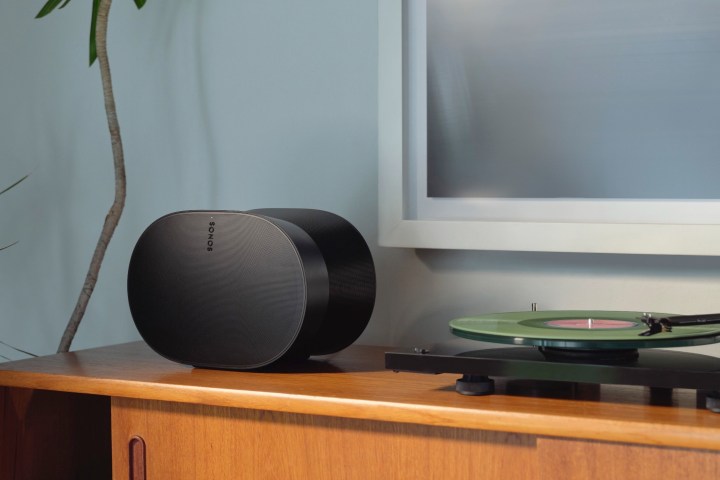
Dolby Atmos Music does for music what Dolby Atmos does for movies and there are now plenty of ways to experience it, from Dolby Atmos-capable soundbars and speakers, like the Sonos Arc and Sonos Era 300, to the wired and wireless headphones you use with your smartphone. It’s impressive when you hear it, but it has different requirements than Dolby Atmos for movies and TV shows, so check out our full Dolby Atmos Music explainer to see if your current gear supports it.
Part 2: channels, speakers, and gear galore
Ready to experience Dolby Atmos at home? Here’s what you should know before you buy.
Dolby Atmos: the gear you need
At a minimum, you need three things to achieve Atmos nirvana.
- Source: The content itself — whether it’s a movie or music — needs to be done in Dolby Atmos.
- Decoding device: Whether it’s a TV, a streaming device, or a stereo receiver, the gear you’re using has to be able to decode that Dolby Atmos source.
- Sound system: Sometimes independent of the device that’s doing the decoding (or sometimes they’re part of the same hardware), you’ll need a sound system that actually supports Dolby Atmos schemes. In other words, a simple stereo pair of speakers won’t get it done.
Dolby Atmos movies, shows, and music

Sources for Dolby Atmos content are now very common. You’ll find Atmos on Blu-ray discs and video streaming services like Netflix, Disney+, Amazon Prime Video, Apple TV+ and many others. For Dolby Atmos Music, your best bets are music streaming services like Apple Music, Tidal, and Amazon Music.
Not all titles come with Dolby Atmos soundtracks. Older movies typically don’t have them unless they’ve been recently remastered, like the Star Wars franchise on Disney+, but it’s very common on new releases, especially Hollywood blockbusters. Another thing to keep in mind: some streaming services like Netflix, only offer Dolby Atmos as an option when you pay for their most expensive subscription tier.
Dolby Atmos playback devices
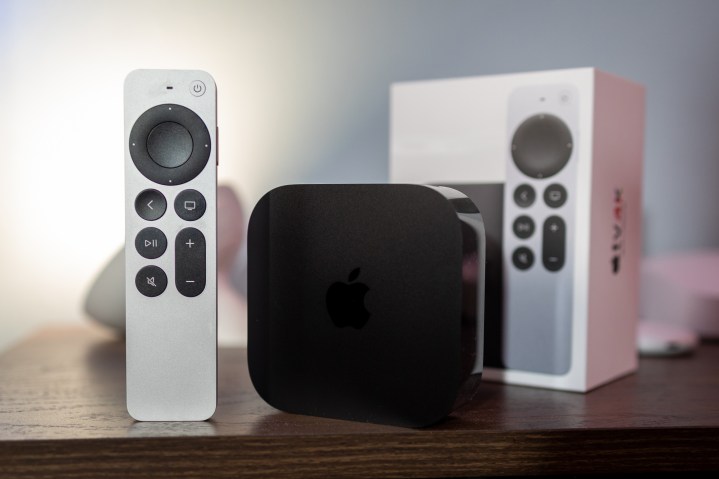
Virtually all Blu-ray players can decode Dolby Atmos from Blu-ray discs. But just to be certain, you may want to check your player’s specifications. With streaming devices like Apple TV, Chromecast with Google TV, etc., it’s much more of a mixed bag. All of the top-end devices from the major manufacturers support Dolby Atmos, but some of the lower-priced models will, too. Again, check the specs to be sure.
There’s a very good chance your smart TV also is a Dolby Atmos playback device. If it is, you’ll be able to hear Dolby Atmos from its built-in speakers. (Again, if the content supports it.) But since TV speakers aren’t exactly the best for big, bold, and immersive audio, you’ll want to make sure the TV can also pass Dolby Atmos through to an external device via its HDMI ARC/eARC port. Not sure what that means? We’ll discuss passthrough more in Part 3.
Dolby Atmos sound systems
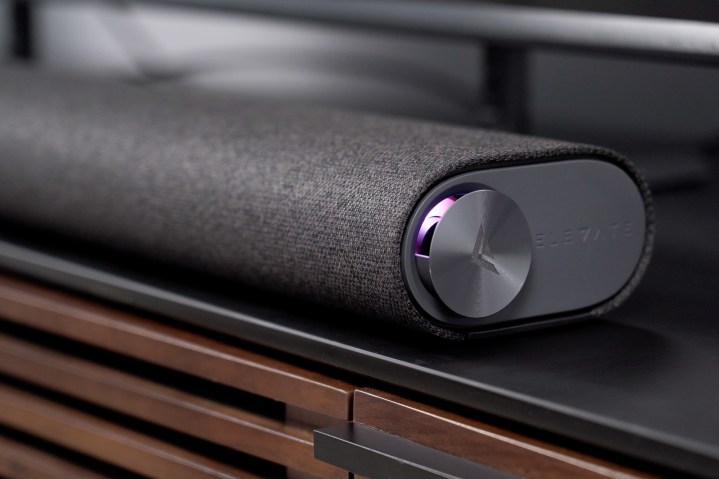
This is the part of the Dolby Atmos equation where you get the greatest range of gear, not to mention levels of investment. As I said earlier, your TV may already comprise a Dolby Atmos sound system. But the odds are good that even if it does, you’ll want something better.
The two main types of Dolby Atmos sound systems are AV receiver-based with wired speakers, and Dolby Atmos soundbars, which may also include additional wired or wireless speakers.
AV receiver component-based systems are considered the gold standard for Dolby Atmos. They give you the most control over the sound because they let you pick each component and place each speaker exactly where you want it to be. If you already own a 5.1 or 7.1 AV receiver-based wired surround sound system, you can keep all of your existing speakers, and then upgrade your system with a Dolby Atmos AV receiver and some additional height-effect speakers. (Which would add another decimal place to result in a 7.1.x or 5.1.x scheme.) Or, your existing AV receiver might already be Dolby Atmos capable, in which case you only need to add height-effect speakers.
The downside of AV receiver systems — especially if you’ve never owned one — is they tend to be expensive, complicated to install, and not exactly user-friendly when trying to adjust settings.
This is why Dolby Atmos soundbars are by far the most popular way to upgrade. They’re simple to set up, typically cost far less than AV receiver-based home theater systems, and some models let you add additional speakers or subwoofers as your needs (and your budget) grow.
In the early days of Dolby Atmos soundbars, AV receiver systems held a big lead in terms of sound quality and immersion. More recently, however, we’ve seen Atmos soundbar systems that would satisfy all but the most demanding audio and cinephiles, though not without a considerable investment, ahem, Nakamichi Dragon.
You may also run into the term Dolby Atmos FlexConnect. This is a new technology created by Dolby that lets select Dolby Atmos-equipped TVs boost their built-in sound systems by sending sound to additional wireless speakers without the need for a soundbar, an AV receiver, or even an HDMI cable.
We have yet to try one of these systems, so we can’t comment on how they perform compared to soundbars or home theater systems, but it’s a good bet they’ll still be better than your TV’s built-in speakers alone.
What about headphones?
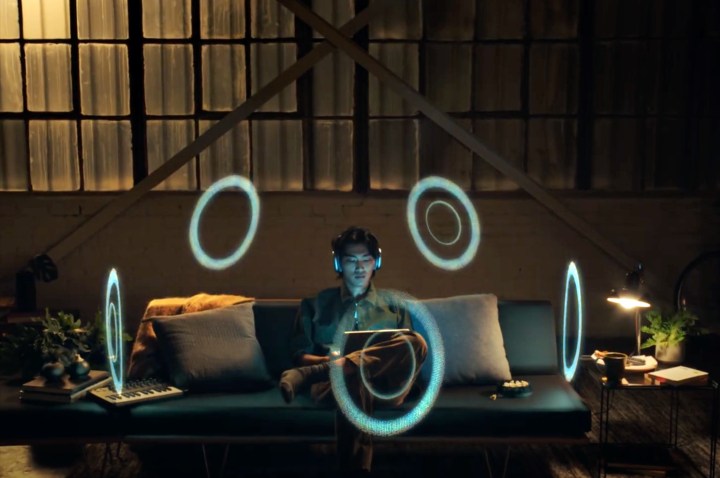
OK, so we’ve covered what you need to get Dolby Atmos sound from your TV speakers, a soundbar, or a home theater speaker system, but there’s one more option: Headphones.
It’s possible to get Dolby Atmos for both movies and music via any set of wired or wireless headphones, but you’ll need some specific equipment to make it happen.
Dolby Atmos for movies via headphones
If you have an Apple TV 4K, you can connect any set of Bluetooth headphones, and the streaming device will create a virtualized Dolby Atmos experience as long as you’re watching a movie with a Dolby Atmos soundtrack. But if you own a pair of Apple’s AirPods Pro, AirPods third-generation, or AirPods Max, the Apple TV will also enable head-tracking spatial audio — an even more immersive version of Dolby Atmos (and multichannel surround) that simulates what it’s like to listen without any headphones at all. It’s quite magical.
You can get the same experience (without the head tracking) on any mobile phone or tablet that supports Dolby Atmos.
Dolby Atmos Music via headphones
If you subscribe to Apple Music, Tidal HiFi, or Amazon Music, you can hear Dolby Atmos Music via your headphones — provided that these services have published a version of their apps that are compatible with your phone, and you’ve selected a Dolby Atmos Music version of the song you want to hear. Not all songs are available in Dolby Atmos. (Again, that goes back to the whole source/device/system thing from earlier.)
Dolby Atmos: what are all of those numbers for?

Surround sound soundtracks and sound systems are defined by channels. A channel is a unique set of sounds, typically assigned to a single speaker. When you see surround sound described as Dolby 5.1, that means the soundtrack includes five channels of surround sound (front left, front right, center, surround left, and surround right) plus one channel dedicated to low-frequency effects — usually handled by a subwoofer.
Dolby Atmos soundtracks add the missing overhead components that give you the dome of sound. But here’s where it can get a bit confusing.
Dolby Atmos is scalable. As long as your AV receiver or soundbar is Dolby Atmos-compatible, it will do its best to deliver a Dolby Atmos experience regardless of whether it has two speakers or two dozen speakers. That’s why Dolby Atmos soundtracks don’t use the typical 5.1 (or 7.1 or 9.1) designations. They’re just labeled as Dolby Atmos.
So why are some Dolby Atmos sound systems advertised with designations like 5.1.4 or even 11.4.6? This is an attempt on the part of the manufacturer to give you a sense of the system’s capability — how immersive it will sound when you use it. The reality is, your Dolby Atmos experience will depend in large part on the number of drivers (the individual components that produce sound) and the number of speakers (the physical boxes containing the drivers) in your sound system.
We’ll discuss the specifics in the next section. But for now, here’s a primer on what these numbers are supposed to represent.
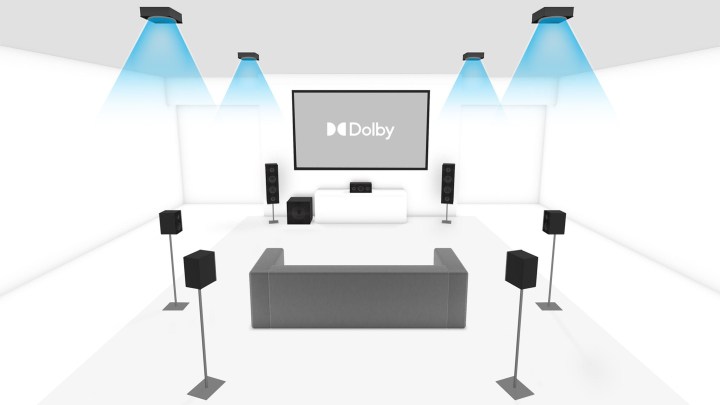
The first two numbers that describe a Dolby Atmos sound system are the same as a traditional surround system — the first number connotes the horizontally arranged channels and the second number is the low-frequency channel. Atmos adds a third number, which represents the “height” channels — the channels that give us that overhead dome of sound effect.
There are tons of combinations, but here are some examples to give you a sense of what we’re talking about:
- 3.1.2 — front left, front right, and center channels, plus a subwoofer, and left and right height channels
- 5.1.4 — front left/right, center, surround left/right, a sub, and two sets of height channels (front height left/right and rear height left/right)
- 9.1.6 — front left/right, center, wide left/right, surround left/right, rear left/right, a sub, and three sets of height channels (front height left/right, middle height left/right, and rear height left/right)
You may also see systems that use a number greater than 1 to represent the low-frequency subwoofer channel e.g. 9.2.4 or even 9.4.4. This means the manufacturer has decided to include multiple subwoofers, for better management (and power) of low frequencies. But because Atmos only has one low-frequency channel, each of these subwoofers gets the same signal.
How far can you go? Dolby Atmos supports up to 64 speaker locations, so the sky is almost the limit.
This triple-digit system represents a best-case scenario. In other words, as in the diagram above, there should be one physical speaker for every channel. However, because some Dolby Atmos systems use virtualization, there can be far fewer physical speakers than channels, and this can mean dramatically different results (see the next section).
It’s also worth noting that your chosen system needs to be of the right scope, scale, and power for your room, otherwise, you could end up with a big invoice and a system that doesn’t sound as good as it could.
Dolby Atmos: discrete and virtual channels
There are two ways that a Dolby Atmos system can deliver sound channels: discretely, and virtually.
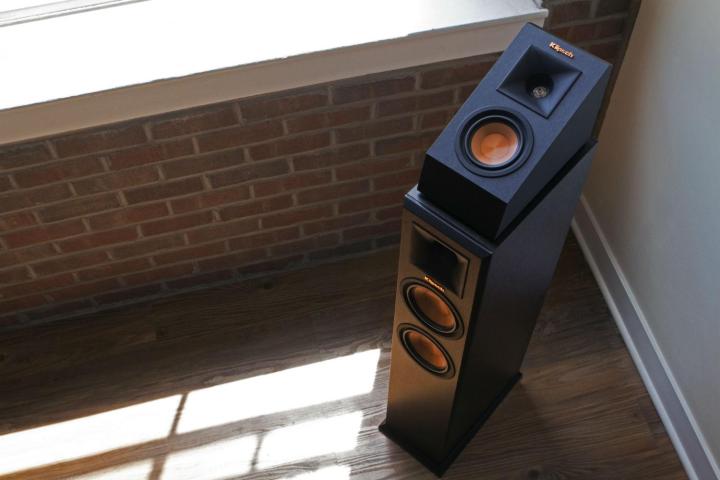
Discrete channels mean that there’s a direct source of sound for each channel. In this perfect world, it’s one speaker for each channel, including the right number of ceiling speakers for the height channels. But making that happen requires a Dolby Atmos AV receiver, lots of speaker wire, and probably some drywall cutting and repair, so a second discrete option exists: Dolby Atmos-enabled speakers.
Dolby Atmos-enabled speakers achieve their height channels by bouncing sound off your ceiling toward you instead of projecting it directly down at you.
More on Dolby Atmos
- How to install Dolby Atmos ceiling speakers
- The best Dolby Atmos movies, from Ready Player One to the new Jumanji movie
- How do you re-create the air-ripping launch of 11,000-hp dragsters? Dolby Atmos
AV receiver owners can buy full-size tower or bookshelf speakers that have these extra, angled drivers built-in, or you can add just the angled driver as its own speaker, which you’d place on top of your existing speakers.
You can even mix and match. Perhaps you initially installed two ceiling speakers but you now want a second set of height channels, and you don’t want to cut new holes in your drywall. You could add Dolby Atmos-enabled speakers instead, (assuming your AV receiver is able to support four or more height channels).
The shape of your room and the height and angles of your ceiling all play a role in determining the right solution.
Soundbars can have the equivalent of Dolby Atmos-enabled speakers too, but we refer to these as “up-firing” drivers, which can be located in the main soundbar as well as in surround speakers if your soundbar has these.
- 1. The Sennheiser Ambeo Soundbar Plus uses nine drivers, including two up-firing drivers to reproduce 7.1.4-channel sound.
- 2. The Sennheiser Ambeo Soundbar Mini only uses six drivers, none of which are up-firing, to reproduce 7.1.4-channel sound.
Virtual channels mean that the sound system is using software known as digital signal processing (DSP) to create “phantom speakers” in your room in place of real speakers. Using the principles of psychoacoustics, it’s possible for instance, for two speakers in the front of your room to simulate an additional two surround speakers. It’s even possible to virtualize height channels, though this effect is usually less convincing than virtual surround channels.
These virtualized channels can’t fully replace real speakers, but we’ve been shocked at just how convincing some virtualized systems can be. Bose, Sennheiser, and Sony each have created Dolby Atmos soundbars that virtualize up to six channels, and they sound amazing.
However, we need to point out a major caveat with virtualization. There is no universal standard for how virtualization is accomplished. This can lead to wildly different results between brands and models. Moreover, from a marketing point of view, Dolby Labs doesn’t distinguish between Dolby Atmos sound systems.
Every system that supports Dolby Atmos technology receives the Dolby Atmos label, regardless of how well it achieves Atmos’ promise of 3D immersion. It’s this situation that has led us to question whether the Dolby Atmos label on a product has a direct relationship to a specific sound experience, or whether it’s simply a brand at this point.
As an example, in the photos above are two Sennheiser Ambeo Soundbars. Both claim to reproduce 7.1.4-channel sound, but the Ambeo Soundbar Plus has nine drivers to work with, while the Ambeo Soundbar Mini only has six. As you might expect, the Ambeo Soundbar Plus delivers a much more immersive performance (it also costs considerably more).
As guidance, we suggest you do two things before buying. First, as always: Read the reviews. Experts who have had a chance to hear many different systems in action will be able to tell you how a given model compares to its peers. Second: It’s not a rule, but generally speaking the greater the number of individual drivers in a soundbar, the better the virtualization effect will be. It’s simple physics — two forward-facing drivers can’t create as complex a sound field as five or more drivers, each separated by a few inches of space, and positioned at different angles to the listening area.
Part 3: Are you actually getting Dolby Atmos sound?
You’ve done all your homework. You’ve got a source of Atmos content that’s being played by an Atmos-capable device and it’s all being routed through a Dolby Atmos sound system. So why doesn’t it sound like you’re actually getting Dolby Atmos?
To get to the bottom of this vexing problem, there are a few more concepts we need to cover.
Dolby Atmos: lossy and lossless audio
Dolby Atmos metadata piggybacks on a traditional surround sound signal. This is why Atmos is backward compatible with non-Atmos sound systems — the non-Atmos system doesn’t know what to do with the metadata, so it ignores it and just plays the traditional surround portion that it recognizes.
There are two flavors of Dolby surround sound that can let Atmos metadata tag along for the ride:
- Dolby TrueHD
- Dolby Digital Plus
Dolby TrueHD is a lossless, high-resolution, multichannel surround sound format. In terms of home theater sound, it’s the gold standard. However, TrueHD’s massive bandwidth requirements make it an impractical choice for streaming services, so, at the moment, it’s pretty much restricted to Blu-rays and Ultra HD 4K Blu-rays.
Dolby Digital Plus can carry the same content as TrueHD, but it uses a lossy, lower-bandwidth format making it the de facto standard for Dolby Atmos on all streaming services. The size difference between the two formats in terms of bitrate is huge. A Dolby Digital Plus soundtrack with Dolby Atmos metadata typically uses between 384 and 768 kbps of bandwidth. The same content in TrueHD uses an average of 6,000 kbps, but can soar as high as 18,000 kbps because there’s no upper limit on TrueHD’s bitrate.
Needless to say, Dolby Atmos over Dolby Digital Plus will be the way most people experience Atmos. For the Atmos Music fans out there, it’s the same story — Atmos Music on Blu-ray will most likely use TrueHD, while streaming services will use Dolby Digital Plus. The one exception (if you can find them) is hi-res music download sites.
Dolby Atmos: HDMI-only
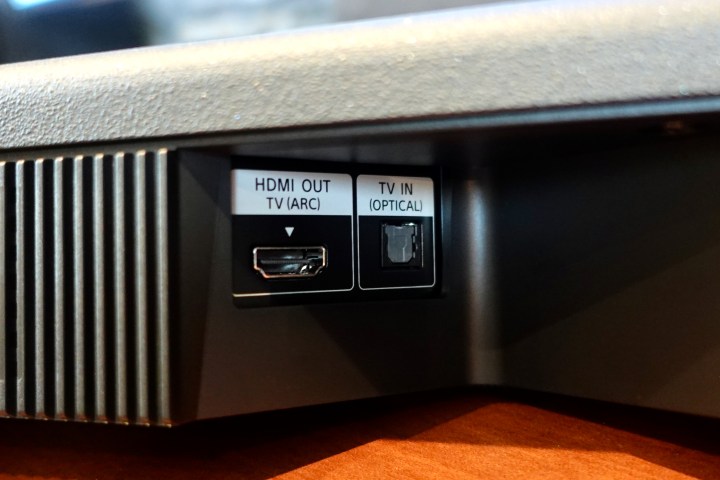
Unless you are satisfied with your TV’s internal speakers (or you decide to try out the Dolby Atmos FlexConnect technology we mentioned briefly earlier), HDMI is a requirement for Dolby Atmos. Whether your Dolby Atmos content is coming from a Blu-ray disc, a streaming box, or even a built-in app on your TV, the only way to get that signal to your AV receiver or soundbar is via HDMI. Both Dolby TrueHD and Dolby Digital Plus versions of Atmos contain more data than a digital optical connection can handle.
However, there are three possible HDMI paths that Dolby Atmos can take to get to your sound system, each with a slightly different set of considerations:
- Direct HDMI from your source device to your sound system
- Direct HDMI from your TV to your sound system
- Indirect HDMI from your source device via your TV to your sound system
Direct HDMI from your source device to your sound system

If you use a Dolby Atmos AV receiver, you will most likely connect your source device (Blu-ray player, streaming media player, etc.) directly to the AV receiver and then let the receiver send the video portion of the signal to your TV. If your Dolby Atmos soundbar has an HDMI video input (many don’t), you can use your soundbar the same way. These connections not only guarantee the best audio quality, but they’re the only way to get Dolby Atmos sound if your TV isn’t Dolby Atmos compatible. These connections work with both Dolby TrueHD and Dolby Digital Plus.
Direct HDMI from your TV to your sound system

If your smart TV is Dolby Atmos compatible, you don’t have to use any other third-party source devices, as long as your smart TV’s apps are also Dolby Atmos-capable. In this case, you’ll use your TV’s HDMI ARC/eARC port to connect to your AV receiver or soundbar’s HDMI ARC/eARC port via an HDMI cable. Since virtually all of your Dolby Atmos content will be streamed and thus in Dolby Digital Plus, it won’t matter if your TV only has HDMI ARC or the newer HDMI eARC — Dolby Atmos with Dolby Digital Plus will work with both. However …
Indirect HDMI from your source device via your TV to your sound system

If you want to use a source device but you don’t own an AV receiver or your soundbar doesn’t have any HDMI video inputs, you’ll need to use your TV as a passthrough that can transmit Dolby Atmos from the source device to your soundbar — and this where your TV’s HDMI port version matters.
Almost all new TVs from 2020 and onward have HDMI eARC. If your TV has eARC, it will pass through any version of Dolby Atmos to your soundbar.
Dolby Atmos capable TVs that only have HDMI ARC should be able to pass through Dolby Digital Plus to your soundbar, but they won’t be able to pass through Dolby TrueHD. Much like an optical connection can’t handle the bandwidth of Dolby Digital Plus, HDMI ARC can’t handle TrueHD. If your source material is only available in Dolby TrueHD, you may not get any sound at all. This can also affect Dolby Atmos from the Apple TV 4K, even though it doesn’t use Dolby TrueHD.
However, some Dolby Atmos TVs with HDMI ARC are able to downconvert Dolby TrueHD to Dolby Digital Plus, while preserving Dolby Atmos metadata. If your TV can do this, you’ll still get Dolby Atmos to your soundbar, even if your source content was in TrueHD.
If you’re using an optical cable to connect your TV to your soundbar or your AV receiver, these signals will be converted into a simpler surround format, like Dolby Digital 5.1, before they get transmitted. The sound you hear will still be really good, but it won’t be Atmos.
Files, apps, and hardware
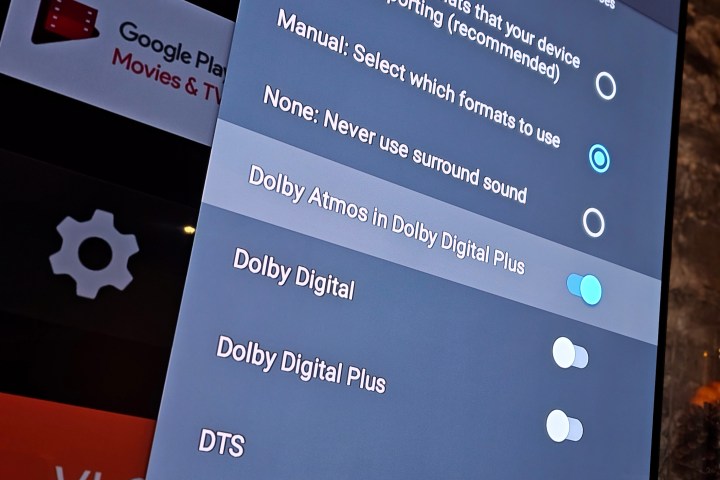
We’ve said it before, but it’s worth repeating: for Dolby Atmos to work, every ingredient in your home theater setup has to support Atmos. In other words:
- The movie you’re playing — whether it’s physical, downloaded, or streamed — has to be encoded with Dolby Atmos (via Dolby TrueHD or Dolby Digital Plus).
- The hardware you’re playing it on has to be able to decode Dolby Atmos. If it can’t, it needs to be able to pass it along to a Dolby Atmos-capable sound system without altering it. This is known as “passthrough.”
- The app you’re using — e.g. Plex, Netflix, Apple TV, Amazon Prime Video, etc. — must be capable of delivering Dolby Atmos data to your playback device.
- And, of course, your TV, AV receiver, or soundbar must be Dolby Atmos compatible, if that’s the device you’re using to listen to audio.
And just to make life more complicated, just because your app of choice supports Dolby Atmos on some devices, that doesn’t mean it necessarily supports it on all devices. For instance: Plex running on an Nvidia Shield TV can pass through Atmos over Dolby TrueHD, and over Dolby Digital Plus, but Plex on an Apple TV 4K will only handle Atmos over Dolby Digital Plus, and Plex on a fourth-generation Apple TV can’t pass through Dolby Atmos at all.

If you’re playing an Atmos-encoded Ultra HD Blu-ray on an Ultra HD Blu-ray player that’s connected to an Atmos-capable TV, soundbar, or AV receiver via HDMI, we can pretty much guarantee you’re getting the full Dolby Atmos experience. We can’t say the same about some other device combinations.
Here are a few examples where you will not get Dolby Atmos sound:
- Playing an Atmos-encoded Netflix movie on an Apple TV HD (4th gen, non-4K) connected to an Atmos-capable AV receiver. In this scenario, the Apple TV is the weakest link: It doesn’t support Dolby Atmos. You’ll be limited to 5.1 Dolby Digital Plus surround sound.
- Playing any Dolby Atmos-encoded content on a Roku Streaming Stick+ that’s attached to a Dolby Atmos capable TV, with an Atmos soundbar connected via optical cable. The obstacle here is the optical connection to the soundbar. You’ve got Atmos content on a device that can support Atmos, on a TV that can pass through Atmos, but because you’re using an optical cable instead of HDMI ARC/eARC, the TV has to down-convert the audio to Dolby Digital 5.1 (otherwise known as AC-3), because optical connections cannot cope with the higher bandwidth requirements of Dolby Digital Plus.
- Using the built-in Plex client on an LG OLED TV to play a movie encoded with Dolby TrueHD and Dolby Atmos, with an Atmos soundbar connected via HDMI ARC. This is a really frustrating one — all of the sources and components are Atmos-capable, but because the Plex client on the LG TV isn’t yet optimized to handle TrueHD/Atmos, it down-converts the audio to Dolby 5.1 — even though both the TV itself and the connected soundbar could have easily handled the TrueHD/Atmos track.
How do I know if I’m getting Dolby Atmos?
Because Dolby Atmos systems can upmix any surround sound signals they get, it can sometimes be tricky to know if you’re getting true Dolby Atmos or upmixed two-channel, 5.1 or 7.1 surround sound. From an audible point of view, if you’re getting Atmos, you should be able to detect sounds as they appear to move from one area of the room to another. Rainfall, bullet ricochets, and whizzing cars are all good candidates for this.
They won’t just move from front to back or side to side; they should also occasionally sound as though they’re coming from overhead, or somewhere above the screen.
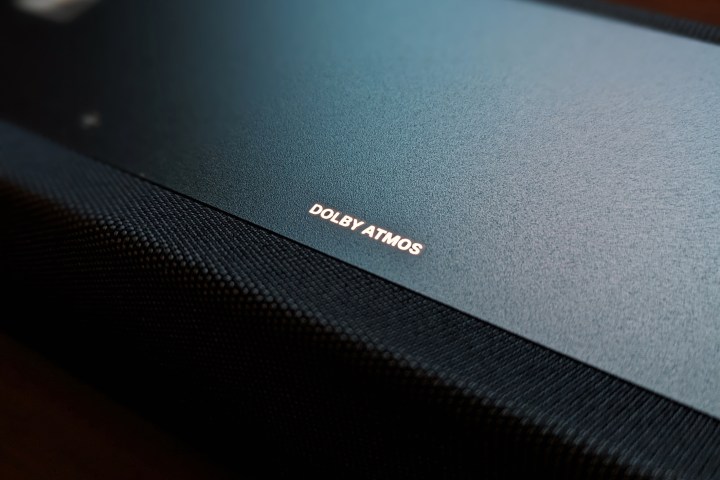
Still not certain? The one surefire way to confirm Dolby Atmos is working is to check the information panel on the front of your AV receiver or your soundbar (if it has one, or perhaps an LED indicator, or an on-screen display). It should display the kind of audio signal it’s currently working with. If the display doesn’t specifically say “Atmos” or “Dolby Atmos,” then the odds are that you’re not getting Atmos. Checking the display is likely easier than queuing up the right soundtrack for a rainfall or ricochet sound check.
Some Atmos soundbars, like the Sonos Arc, Bose Smart Soundbar 900, and LG S95QR, will show you the audio signal within their respective mobile apps for iOS and Android.
One more thing
We have one last troubleshooting trick up our sleeves for those of you who still can’t get Atmos to appear despite exhausting all the protocols mentioned above. TVs and streaming devices have different settings for their digital audio outputs. Most of the time, they’re set to “auto” by default, which is what you want.
But sometimes, they end up in PCM (Pulse Code Modulation) mode, which strips out Dolby Atmos metadata. Perhaps you have troubleshot your device every way you know how and still can’t pick up Dolby Atmos. In that case, we recommend you navigate its settings to see if it’s in PCM mode. If it’s set to PCM, change it to Auto or Bitstream.
There may also be more than one settings menu. On the PlayStation 4, if you want to play Blu-ray discs with Dolby Atmos, you need to confirm that both the main system audio settings and the audio settings for your Blu-ray disc itself are set to Bitstream. Not all setups are compatible with Dolby Atmos, so if this doesn’t work either, you might have an incompatible system.
Achieving proper Dolby Atmos requires a bit of diligence and technical know-how on your part, but it’s totally worth it. The result is a clearer, richer sound that surpasses 5.1 or 7.1 surround. We have created the diagram above to provide you with the proper guidelines to ensure that your Atmos setup goes off without a hitch. Once you dial in your files, hardware, apps, and settings, you should be able to achieve an impressive Dolby Atmos sound that’s worth all the effort.
Editors' Recommendations
- Ultimate surround sound guide: DTS, Dolby Atmos, and more explained
- 20 of the best Dolby Atmos movies to watch in your home theater
- The Lucid Air EV becomes the first car with Dolby Atmos sound
- Denon’s Dolby Atmos Home Sound Bar 550 takes versatility to a new level
- Samsung’s 2020 soundbar lineup adds Dolby Atmos to your TV starting at $700


